
Fonteva: Financial reconciliation

Thanks for staying with me. This might be the most important topic I cover in this series – Reconciliation.
Reconciliation can be challenging, but if you do it often enough, you will sail through your audits easily because you will know that the transaction entries created by Fonteva match ledgers in your financial system. Fíonta has worked with clients to help streamline that process and it has been transformational. Here are some key elements to help you get started.
Access the Entire Fonteva Finance App Series Watch now
Validate
Step 1 is to make sure that the transactions in Fonteva are all in balance and coded to the right accounts. This can be validated by creating a report. It is recommended that you have a standard set of reports that you can use each month to check your numbers before you export them to your financial system. Furthermore, we suggest having two versions of the same report: a summary version and a detailed version.
The beauty of this is that when you use the Salesforce reporting tool, you can create one report for your detail version, and then just save another copy and make that your summary version.
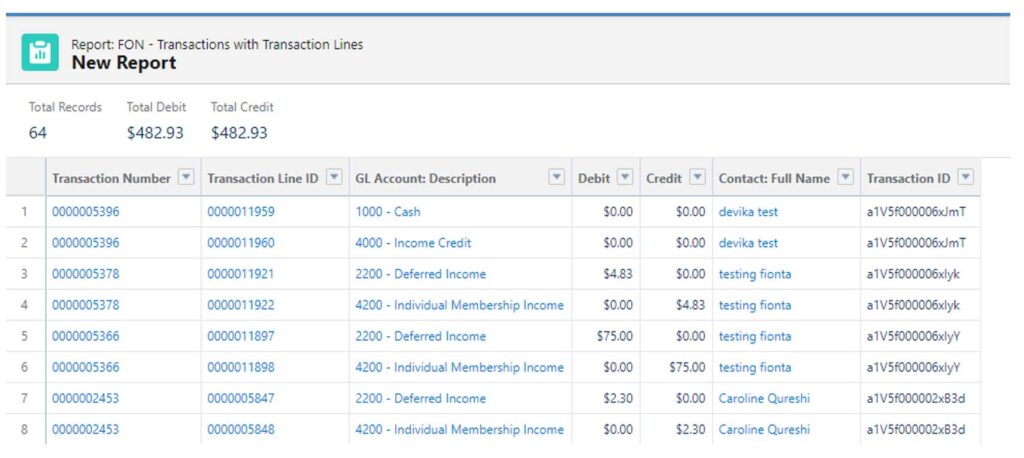
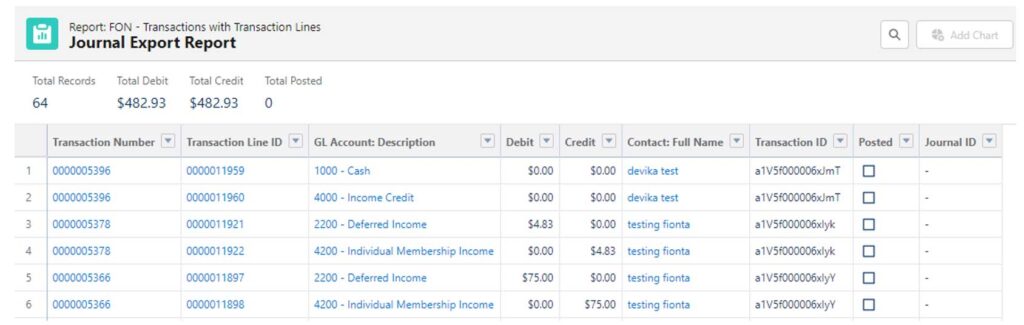
Create your detailed report first. Use the “FON – Transactions with Transaction Lines” report type and filter for transactions with a transaction date of “Last Month”. Using that relative filter means you won’t have to update that filter each time you run the report.
This report will become your export to your financial system, so at minimum, you’ll want to display the customer, date, GL account description (account number), debit, and credit columns. Depending on the additional required by your finance system, those columns can be added to the report as needed. Be sure to add the Transaction ID field as this will be key later for the true reconciliation piece of this puzzle.
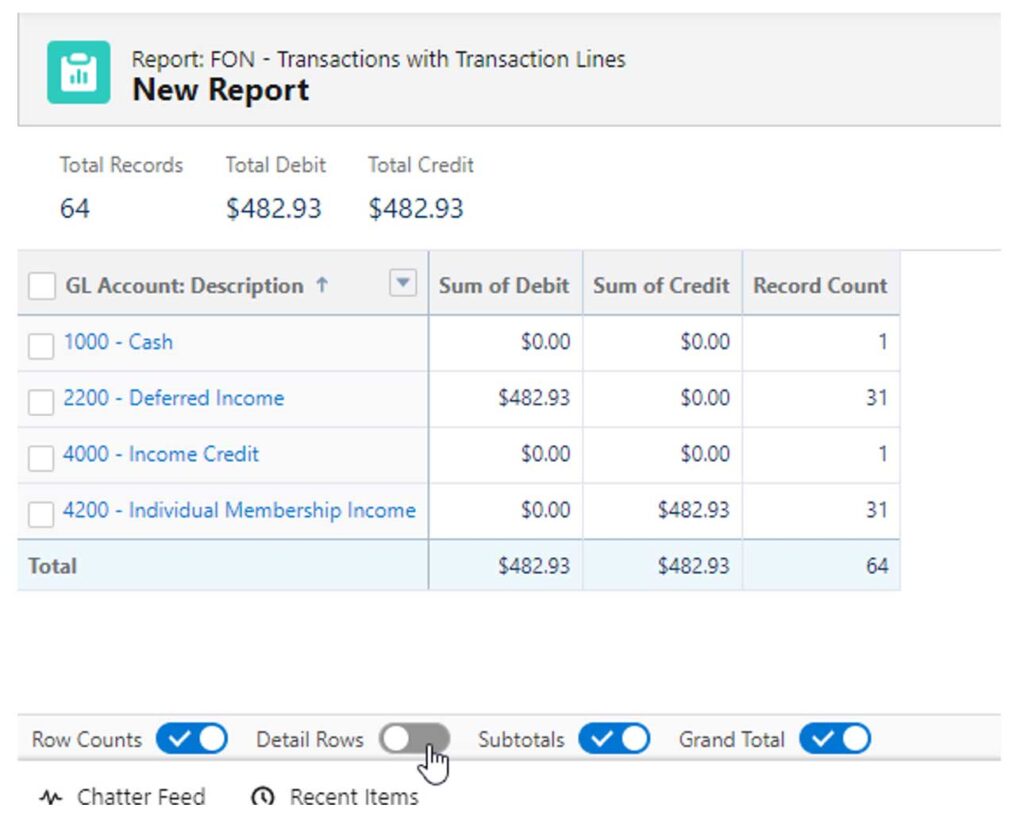
Once you have that report the way you want it, save it. Then use the “Save As” function to create a copy and include a summary in the report name for this new copy.
In the account description (the summary report), switch to edit mode and navigate, go to the outline panel and add a grouping on the GL Account description plan. Then scroll to the bottom of the screen and turn off record detail. This will leave you with a quick summary of all the included transactions so you can make sure everything balances and make sure an incorrect account number hasn’t been used. This report now mimics a summary journal entry.
Once you are sure your transactions are balanced, and the amounts look accurate, it’s time to export.
Export
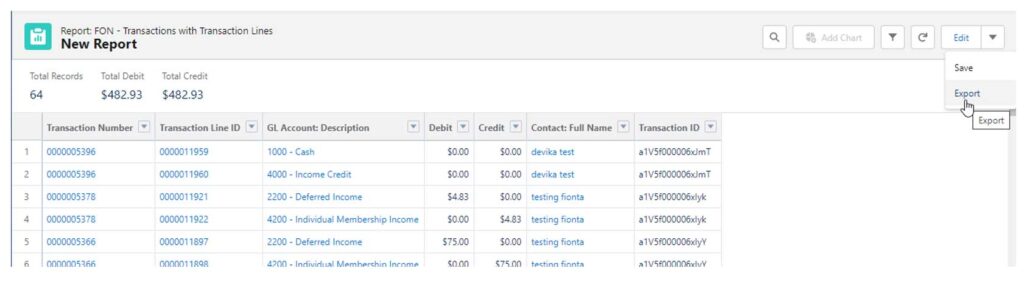
Exporting is the easy part. If you want to go with the Summary journal entry, you can. Otherwise, run the Detail version of the report and export it to a CSV file. Then import it into your financial system.
Update
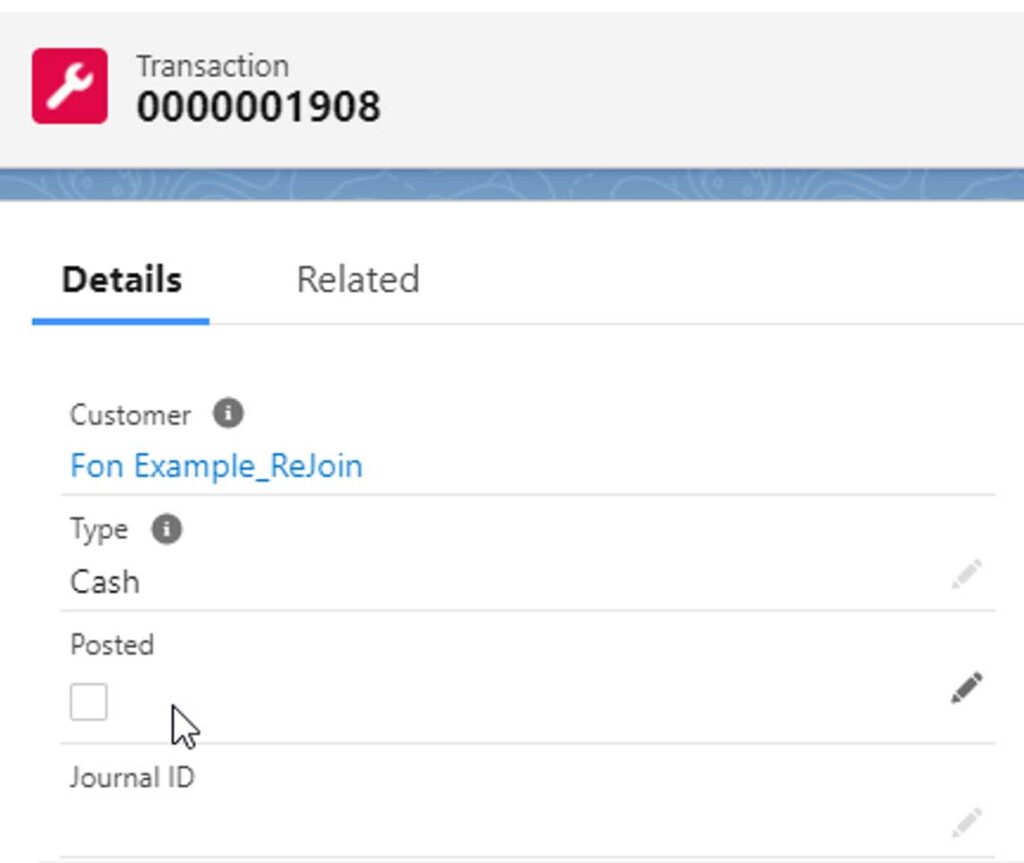
This is the key! Once you’ve exported Transaction data to your finance system, you need to close the loop. It’s important to mark in some way in Fonteva that you’ve already posted that transaction data to your finance system. This will prevent anyone from accidentally posting the same transaction data.
This is not standard Fonteva functionality, but it is important, so we recommend adding two fields to the transaction record. The first field is a checkbox field called “Posted” and the second is a text field called “Journal ID”. Make sure those fields are added to your detail/export report so they are included each time to export the file.
Now give that file to your system administrator. They should be able to take that file, add the new journal ID from your finance system, and update those records with a posting status and Journal ID.
To be extra careful, you can add filters to your export report to exclude any records where the posted checkbox is checked and the journal ID field is not blank.
Now that you’ve closed the loop, it will be so much easier to identify if transactions missed transactions in the posting process, and duplicate journal entries in your financial system will be evident.
Access the Entire Fonteva Finance App Series
We have collated all blog posts into an easy-to-consume PDF e-book and each accompanying webinar recording is included in the full video.