Pardot comes with three native connectors to webinar products – GoTo Webinar, ReadyTalk, and Webex. If your organization uses one of those products then it’s a simple process to connect the two tools. Once connected, you can create Pardot forms for webinar registrations, score prospects based on registrations and attendance, create new prospects based on registration, and view webinar registration and attendance within the context of Pardot and Salesforce campaign reports.
But, what if you use Zoom for webinars?
Many of our nonprofit and association clients use Zoom for webinars and, as a matter of fact, so does Fíonta! We’re not alone…with 42.8% market share in April 2020, Zoom is ranked as the leading web conferencing platform in the United States.
Reasons to integrate Zoom and Pardot
- Capture net new registrants and create Pardot Prospects
- Automatically add registrants to a Pardot list for future engagement
- Add attendees and non-attendees to unique lists following the webinar
- Build automation rules based on list inclusion, e.g., add tag for attendee, registrant, webinar topic, etc.
How to integrate Zoom and Pardot
Zoom’s recently released a Pardot integration app which makes adding registrants to Pardot lists a simple process. Follow the instructions below to configure your Pardot account and map Zoom fields to Pardot fields. This only needs to be done once. If you’ve already completed the setup, jump down to learn how to leverage the integration as you schedule upcoming webinars.
Configure your Pardot account
Step 1
Install the Pardot App from the Zoom App Marketplace (you will need to be granted Zoom administrative privileges if you don’t already have them).
Step 2
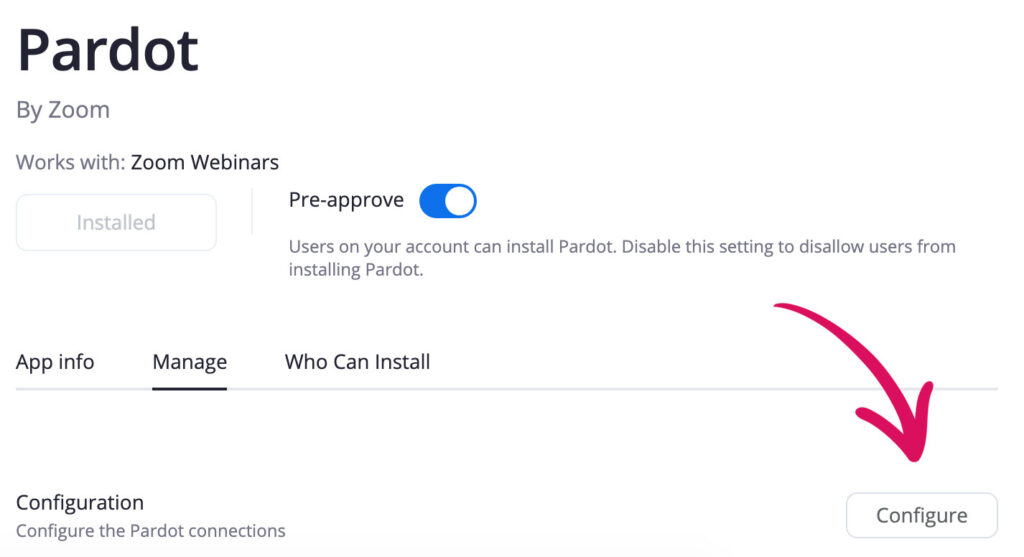
Configure the Pardot connections by clicking Configure button in the Manage tab (shown below).
Step 3
You will be prompted to enter credentials for:
- Email (email address used to log in to Pardot)
- Password (associated password)
- User API key (To obtain this API Key, login to your Pardot Account and click Settings > My Profile > API User Key.)
- Exclusion domains, if desired (Any email domains that you would like to have excluded for registrants, attendees, and absentees. This will block users of these domains from being added to the Pardot lists.)
Important! The Pardot account configured in this integration must not be a “linked” Salesforce account. The account should be independently created in Pardot and not associated with a Salesforce User.
Pardot user accounts are almost always associated with a Salesforce login, i.e., a Pardot user logs into Salesforce with their username/password and accesses Pardot via single-sign. Here’s the workaround…
Create a new user in Pardot and do not map to a CRM username. See screenshot below.

Step 4
Click Save to complete.
Webinar setup process
Step 1
In Pardot, create two new lists – [Webinar Name] Registrants and [Webinar Name] Attendees. If you’d like you can create a third list called Non-Attendees or Absent. Assign the lists to your relevant Salesforce or Pardot campaign.
Step 2
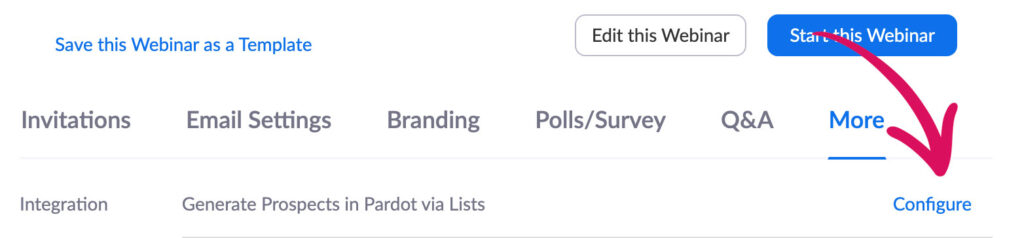
In Zoom, create a new webinar as you normally do. Click on the More tab and then on Configure (as shown below).
Step 3
Select the Registration, Attendee, and Absentee lists from Pardot that you want to populate from Zoom.
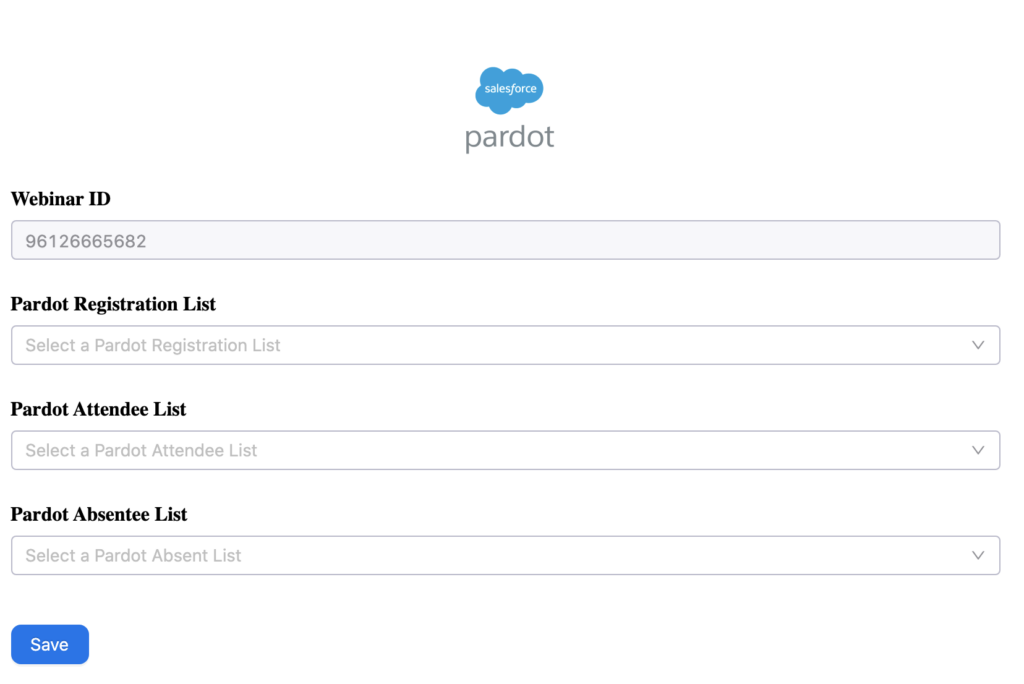
Your new webinar is now configured to sync registrant and attendee information with Pardot.
Populating Pardot fields with Zoom data
The following fields are automatically passed between Zoom and Pardot:
Zoom Field Name -> Pardot External Field
- Email -> email
- First Name -> first_name
- Last Name -> last_name
- City -> city
- State/Province -> state
- Zip/Postal Code -> zip
- Country -> country
- Phone -> phone
- Job Title -> job_title
- Organization -> org
- Industry -> industry
- Purchasing Time Frame -> purchasing_time_frame
- Role in Purchase Process -> role_in_purchase_process
- Number of Employees -> no_of_employees
- Questions & Comments -> comments
When you create your Zoom form, you may choose any number of the above default Zoom fields which automatically map to Pardot fields.
Adding custom questions to Zoom forms
You may find that you need to request specific information from webinar registrants unique to your organization’s business process.
Step 1
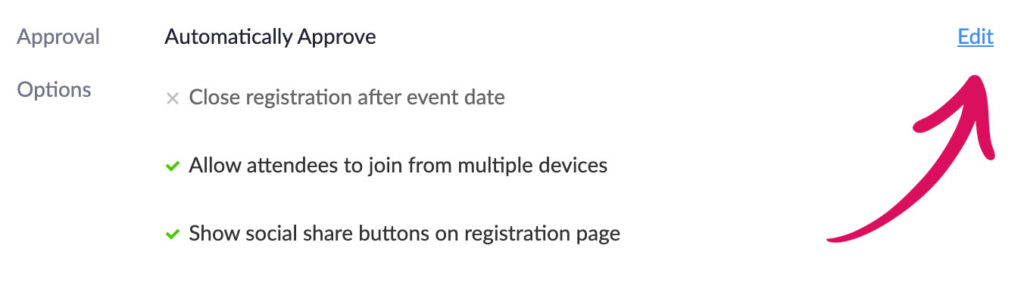
Within your webinar in Zoom. scroll down to Approval Options and click Edit.
Step 2
Click Custom Questions and New Question. Select the field type (short answer, single answer, or multiple answer) and add your question.

Step 3
In Pardot, create a new Custom Field to map responses to. The custom field should match the question in Zoom exactly with underscores being used in place of spaces. For example, the custom field in Pardot for “Are your certifications up to date?” should be Are_your_certifications_up_to_date.
Conclusion
Once you have the initial configuration done, connecting individual webinars with Pardot is fast and easy. Beginning with the first registrant, you will collect valuable information in Pardot which can be used to inform the webinar presentation itself and communications before and after the webinar. And just a few other ideas as food for thought…
- Create automation rules to
- adjust score on registration, attendance, and even non-attendance
- add tag(s) to indicate webinar type, interest area
- update Campaign Status from Sent to RSVPed to Attended
- kick off an Engagement Path for pre- and post-webinar emails rather than using Zoom to manage email communication
- Build new lists with Segmentation Rules with criteria specific to the webinar, e.g., create a list of all July webinar attendees who are also members.
- After the webinar, upload the attendee report and record length of time in the webinar to a custom field; increase score for attendees who stayed for the entire webinar.